
 I assist with the occasional photo workshop (John Barclay Photo Tours) and I am seeing something that bothers me. Participants are coming with a 10-stop ND filter and wanting to do 30-second or longer exposures. There’s always disappointment when they learn this filter will only give them a few seconds.
I’m not claiming that I’m an expert, but I do shoot a lot of long exposures and would like to share my thoughts on choosing the right ND filter. This guide assumes you are shooting in bright sunlight (the “worst” condition you’ll encounter) at ISO 50 and f22.
First, how strong of a filter do you need? You can purchase anything from 2-stops up to 20-stops; so which one do you need and do you need more than one filter?
The first thing you should know is that it takes 13-stops of ND to get a 30-second exposure in bright sunlight. This means that a 10-stop will only get you about 4 seconds, hence the workshop participants disappointment with their 10-stop.
I find myself mostly shooting in the 30-second to 4-minute range. Using this range as typical, here is how I view the various ND filter choices.
1 to 4-Stops: these filters are primarily used by photographers who want to open up their aperture so they have limited depth of field. They’re really not suitable for long exposure work.
5-Stop: I don’t use this filter alone because it will only give about an 1/8 second exposure in bright sunlight, but it can be useful at dusk or when stacked with another filter.
10-Stop: with this filter you can get between 2-4 seconds in bright sunlight. I use it generally at dusk or with overcast skies.
13-Stop: this is what you need to get a full 30 second exposure in bright sunlight and on an overcast day you can go to 1 or sometimes 2 minutes.
15-Stop: I consider this to be the ideal ND Filter and the one that I use 90% of the time. Why? Because it gives me two minutes in bright sunlight and longer in cloudy weather. If I had to live with just one ND filter, this would be it.
20-Stop: A very strong filter that allows me to to shoot a 60 minute exposure…if I wanted! However image quality will suffer with these long if exposures, as the sensor heats up, and so I rarely go past 8 minutes with this filter. I only use my 20-stop once in a while, but when I need a very long exposure, I’m grateful to have it.
Vari-ND: The Vari-ND is a specialized variable filter that adjusts from between 3-8 stops. I stack a 5-stop on top of it so that I now have 8-13 stops of ND which can give me a 30 second exposure.
Why might a person want a variable ND filter? I use it when photographing moving subjects that require me to frequently recompose. If I’m using a 10-stop or stronger filter, the viewfinder is so dark that it’s difficult to see or compose with an SLR.
With the variable filter I can “open it up” so that I can see, focus and compose through the viewfinder, and then “close it down” for shooting. (you open it and close it by turning the filter like a polarizer) It is extremely convenient and it is the reason I was able to photograph the Ghost of Auschwitz-Birkenau project in two hours.

So those are the basic ND filters you might encounter. But besides ND strength, there are a couple of other things you’ll want to know when purchasing a filter.
Filter Size: I go with an 82 mm filter size and use step-up rings on all of my lenses. This allows me to do two things: first, I can use one set of filters on all of my lenses. And second, I can minimize vignetting because of the wider filter.
Thin Filters: To further minimize vignetting, I always purchase thin filters. Thin is always better.
Front Threads: I want all of my filters (ND and otherwise) to have front threads. This allows me to stack filters, such as a polarizer + an ND, or two ND filters stacked together for greater strength.
Color Cast: I am not a color photographer but a quality that others appreciate about Singh-Ray filters is that they are color neutral, they do not give your image a purplish cast. This is not true of other “less expensive” filters.
Labeling: One thing I really like about Singh-Ray ND filters is how they label their filters; 5-stop, 10-stop, 15-stop and etc. It is easy for me to understand what a 15-stop ND filter is, but what the heck is an ND4 or a .9 filter? (2-stop and 3-stop)
Now there are other filter options that I haven’t mentioned such as a graduated ND filters and a ND filter that is combined with a polarizer, but I don’t use them and so I cannot speak from experience.
Conclusion: If I were buying my first ND filter I would buy a 15 stop because with just this one filter I can do about anything. My second filter would be a 10 stop for use on cloudy days and dusk shooting. With these two filters, I can shoot from 30 seconds and up to 2 minutes, and perhaps up to 4 minutes on a cloudy day.
The 5 and 20-stop filters are luxuries, but if I could purchase one more it would be the 5-stop which I could use at dusk and could also stack on top the 15-stop filter, giving me 20-stops.
 Here are the filters that I carry:
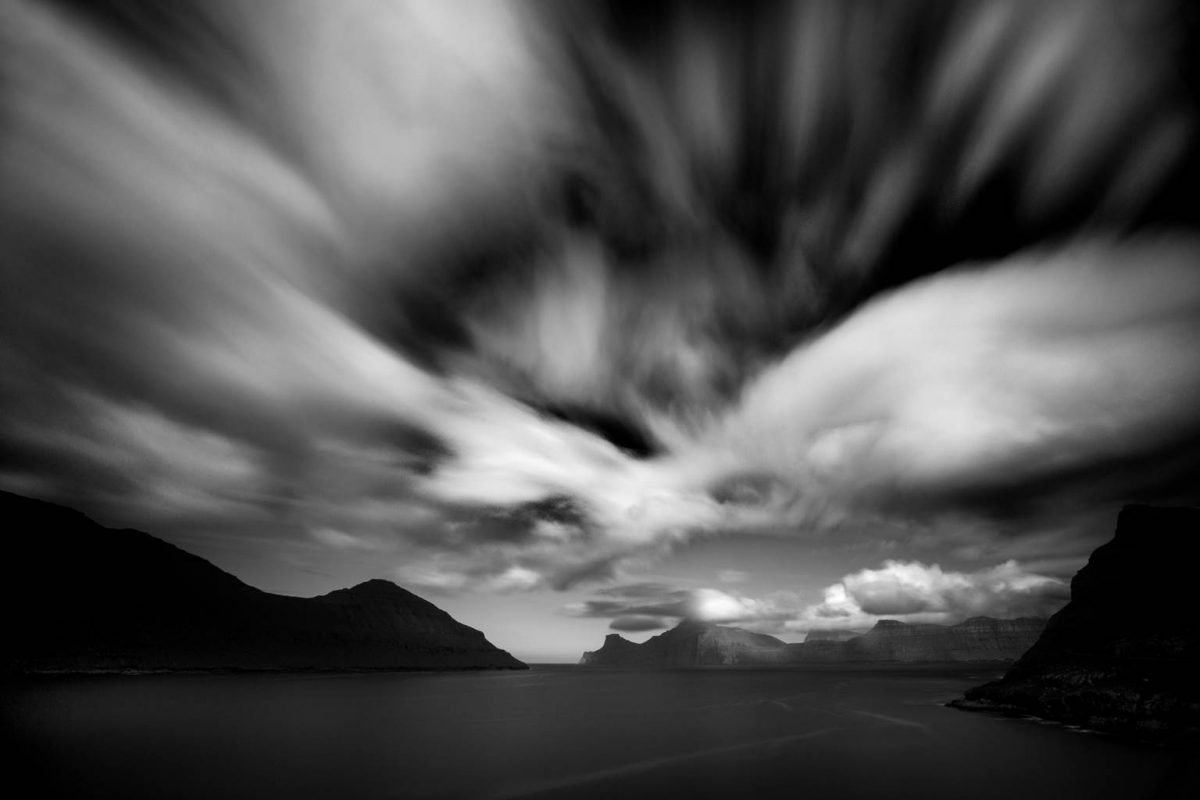
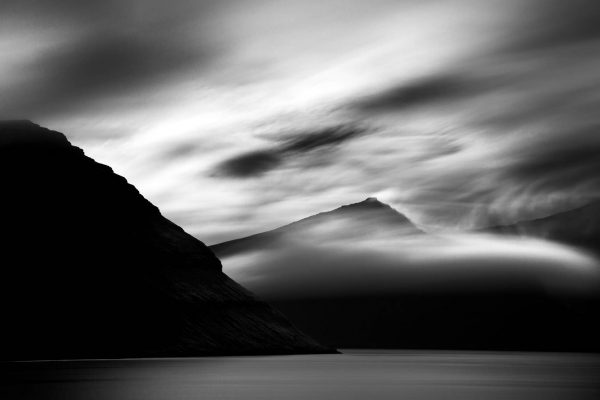
I’ve just returned from a trip to the Faroe Islands where I exclusively shot long exposures. I used the 15-stop the most and the 10-stop next. I often used my polarizer stacked with one of those two filters.
If you have questions about ND filters or how to use them, feel free to write me at Cole@ColeThompsonPhotography.com.