Nowadays, my photography is still a passion that I pursue both as a doctoral graduate in biology and as a frequent photo workshop leader.
While the magical effect of a polarizer is nearly impossible to recreate in image editing software, there are now all kinds of computer-based ways of replicating the effect of ND grads in post-production. In fact, many software packages offer built-in ND grad ‘effects’ that can easily be applied to images. We also have HDR software techniques that make it possible to create images with a considerable range of highlight and shadow detail. So, if that’s the case, why do I still carry a set of Singh-Ray ND grads with me in the field?
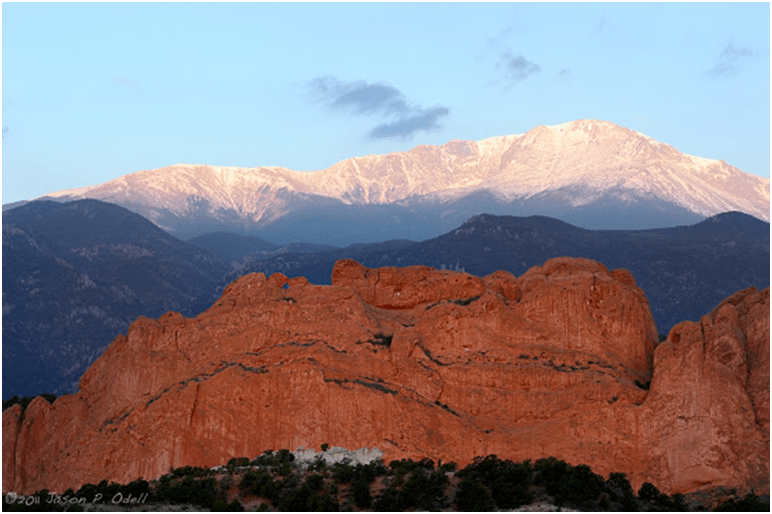
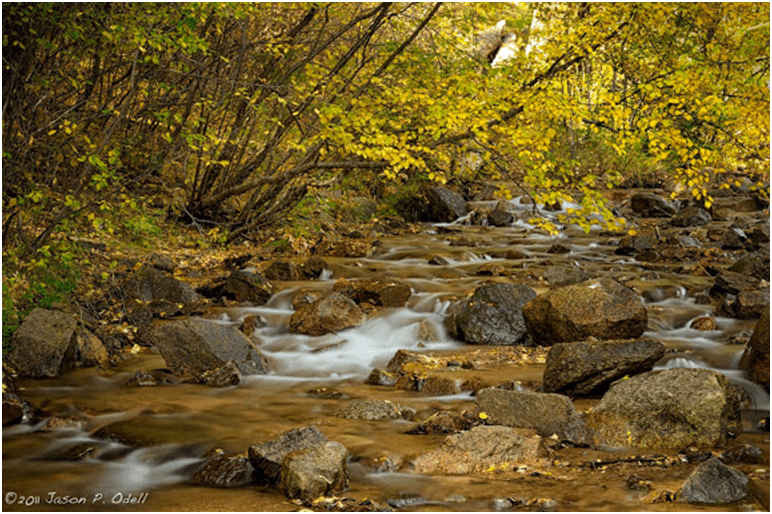
The short answer is to more easily capture outdoor images such as the one above of Kissing Camels and Pikes Peak near my home in Colorado Springs, CO. I used my 2-stop hard-step ND Grad to quickly balance the bright sky and snow-capped mountains in the distance with the foreground. I used my Singh-Ray Vari-ND filter for the image below of this year’s fall colors along North Cheyenne Creek. The variable density of the filter enabled me to extend the exposure time sufficiently to blur the motion of the stream for a more flowing effect.
The Challenge of ND Grads
I’ll be the first to admit that even when I bring my ND grads along in the field, I don’t always use them. ND grads can be tricky to align, especially in the semi-darkness of twilight. You also need to choose the right filtration strength. Reflections, for example, should not be brighter than the actual object, but that can be something hard to spot in the field. On the plus side, however, having a DSLR makes using ND grads a little easier. First, I can use live view to help position the filter in the frame. Second, I can review my images immediately and decide if they are OK or need to be retaken. But more than that, there are those times when a filter is actually preferable to using software or HDR techniques in a landscape shot.
The Case for Carrying ND Grads
The traditional advice we get for exposing outdoor images is “expose for the highlights and recover the shadows.” What this means is that we’ll often deliberately underexpose the middle tones in the scene to preserve hard-to-recover highlight details. We then bring back the shadow details during post production. This technique works fairly well most of the time, but it does have some drawbacks, namely the risk of adding noise and losing color saturation. The resulting image can often look flat or lifeless because the shadow contrast just isn’t there. However, if we use a Graduated Neutral Density filter to reduce the exposure level in the highlight areas, we’ll have a better overall exposure balance and cleaner shadows.
Professional quality ND Grads are flat, rectangular filters designed to slide into a holder mounted on the front of your lens. These holders can be mounted on lenses of various sizes by means of adapter rings that screw into the filter ring of the lens. This means you can use ND Grad filters on just about any lens in your kit. You can not only rotate your ND Grads, but you can also slide them up and down to position the gradient exactly where your composition dictates.
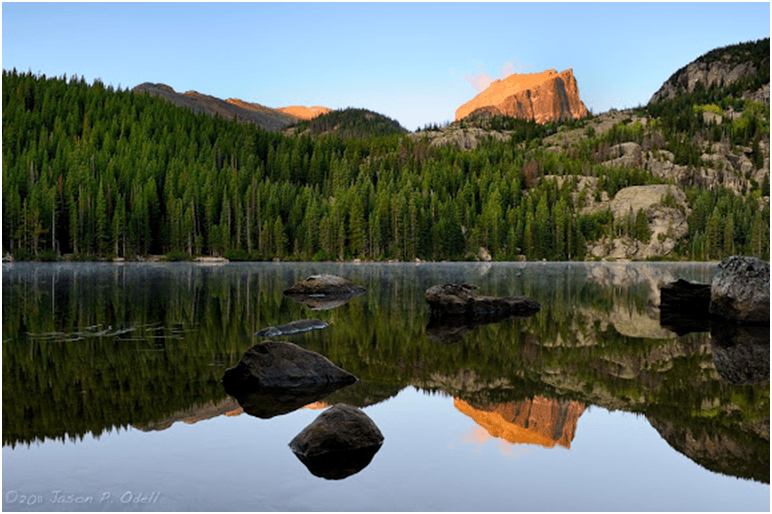
Rectangular filters come in two popular sizes: P-size and 4×6-inch. Many years ago, I started with the least expensive set I could get in the P-size format. I have since decided from experience that I should have purchased 4×6-inch filters from the outset, despite their higher price. While leading a recent photo safari in Colorado, I used a 4×6-inch 3-stop soft-step ND Grad to capture this sunrise image at Bear Lake. Having a larger filter means that I can hand-hold it without getting my fingers in the frame. Hand-holding also allows me to move the filter up and down during long exposures to further blur the transition zone.
The other two factors in choosing ND Grad filters are density and edge type. You’ll see that Singh-Ray offers 1, 2, 3, and even 4-stop ND Grad filters. The density you choose will depend on the amount of shooting that you do and where you shoot. For most landscape photographers, you’ll get by with 2 or 3 stops most of the time. If you’re shooting out west or in alpine elevations, you’ll want to add a 4-stop filter because the exposure range tends to be much wider in the thin, dry air of the mountains. You can get either soft or hard-step filters. A hard-step filter has a relatively narrow transition zone between the clear half of the filter and the full density, while the soft-step filters offer a wider transition zone. Hard-step filters work best with telephoto lenses and for scenes with well-defined, straight horizons. With a wide-angle lens, you’ll want to use a soft-step filter to mask the transition zone due to the very large depth of field these lenses create. Keep in mind that you can also stack multiple ND Grads to get different effects; just be careful to avoid vignetting on wide lenses.
Even if you’ve mastered the computer-based, post-production techniques for image adjustment, you may still find it helpful to use ND Grads in the field. For me, they really come in handy whenever landscape photos are on the agenda.