We almost always get our share of great light — most often at the beginning or the end of the day — no matter what time of year or location we’re visiting. But we all realize there will also be those really challenging times when we need to work with the light we’re given. That’s often when we learn the most. The best solution I have found for the lack of ‘good light’ is stronger composition and more creative selection of subject matter. That’s why reflected images are a big part of my approach to overcoming poor lighting conditions in my nature and landscape photographs.
The well-framed reflection adds depth and scale to an image. To be honest, reflections are such a strong element for me that I actually seek them out. There are, however, several basic facts I keep in mind as I photograph reflections. First, the mirrored image will not usually serve effectively as a strong focal point, although it will lead the eye in that direction. I also try to keep the composition as uncluttered as possible — realizing that almost any mirrored image will tend to be very busy to start with. When I’m showing both the focal point and the mirrored image in the composition, then I keep the exposure darker in the reflection. When using my ND Grads, I’m especially careful that I don’t hold back so much of the background exposure that the reflected image appears brighter than the scene itself — an effect almost never found in the real world.
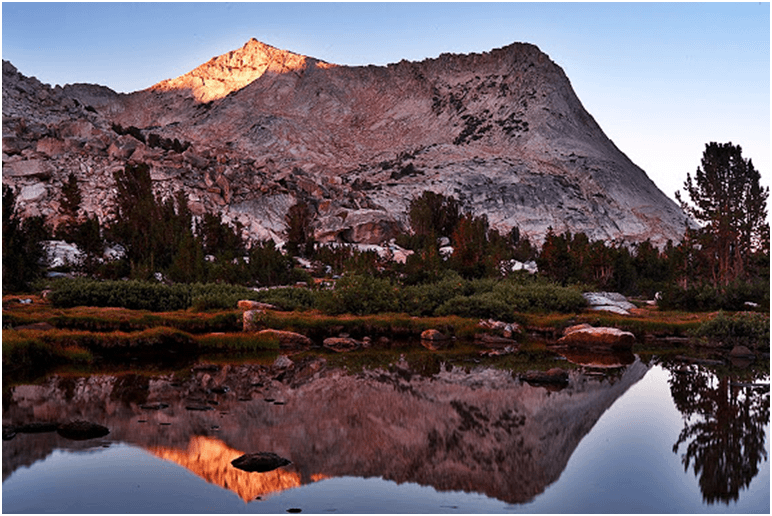
When composing the scene above — with the shoreline in shadow and the very bright, almost blown-out reflected light from the sky — I realized that the shaded green was rendered dull. My LB ColorCombo helped increase the intensity of the green and provided a slower shutter speed to slightly blur the moving water. The reflected portion in this image was a far stronger element, so I composed the image to hide the fact that there was not much green above the water. Since the focal point was going to be the shoreline, about two thirds of the way into the composition, I took care not to overexpose the reflected portion and thereby risk that the eye would not get there! Remembering that the reflection must be darker than what is reflected took care of this problem. Now all that was needed was a slow shutter speed to add a touch of blur. My 4-stop hard-step Graduated Neutral Density filter held back the reflection as the LB ColorCombo filter increased the color contrast and saturation. Looking for deeper saturation? Nature always provides it in the reflected image!
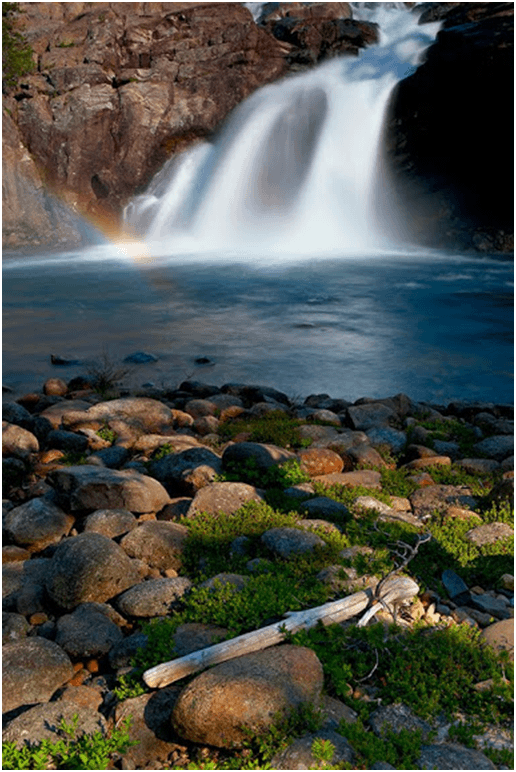
In this next image, the rainbow in the cascade was all but invisible before I placed the new Singh-Ray Vari-N-Trio on my lens. That’s when the highlighted green on the rocks of the shoreline plants also jumped to life! The success of this image started with the intensification of the earth tones and continued with the polarization that reduced the glare from the rocks and helped accentuate both the rainbow and the foreground. The third and final effect produced by the Trio was to slow the exposure to blur the cascade just enough to hold detail in the water and create the backdrop that would help make the rainbow more prominent.
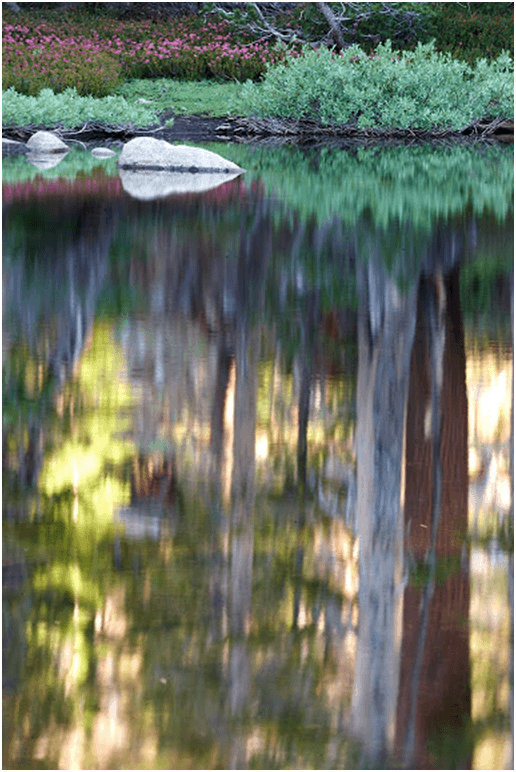
Here’s a classic example of seeing– yet not really seeing– the green trees that show life contrasted against the mostly sterile high-country granite of Yosemite’s Vogelsang Peak. The use of the ColorCombo here brought the reflection to life and the deep green of the forest color became rich and saturated instead of muted and murky. In this composition, I was careful to anchor the rock in the lake in order to lend a helping hand to the reflection. Exposure was going to be a problem, but I realized that if I kept the mirrored portion darker, I could use my 3-stop soft-step ND Grad and just let the shadows fall where they may.
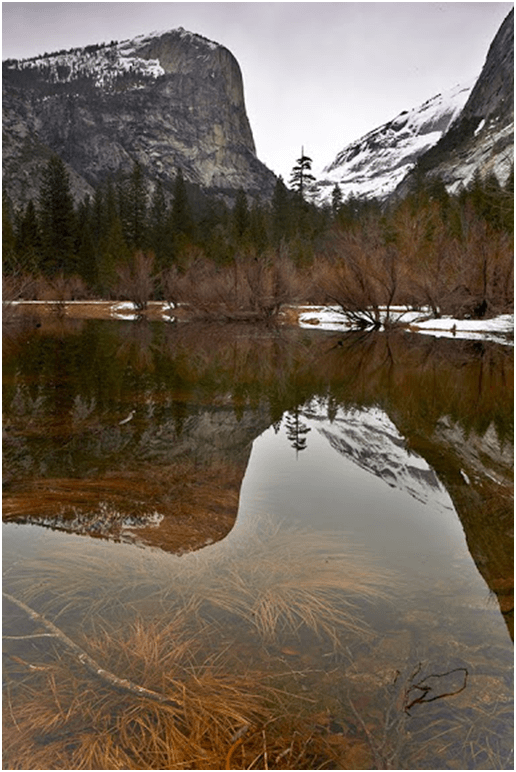
When capturing this image of Yosemite’s Mount Watkins reflected in Mirror Lake, a ColorCombo helped in two important ways. The filter’s built-in polarizer allowed me to control the amount of visibility under the surface of the water, which was important to tell the story of the downed limbs and the passing of another season into winter. Showing that life will endure until next spring was also achieved by intensifying the green of the distant evergreens. Balancing the exposure was a very important part of this composition. Confronted with a blustery, washed-out sky, the white detail of the snow-covered granite was easily lost. The saturation of the green trees, especially in the reflection, helped to mask this problem. Knowing I would be measuring success by the exposure of these trees, I based my meter reading on them and opened up another stop to give detail. I then added a 3-stop soft-step ND Grad to separate the snow-covered granite from the sky.
Water is never motionless! Even if it’s in a stagnant pool, water has some motion that I usually want to show. A slight touch of motion blur adds to the ‘feeling’ of water, and a slow exposure is one of the best tools I have for producing such a blur. Starting at 1/8 sec. for slow-moving water, and then increasing my shutter speed accordingly — sometimes up to 1/500 sec. for big waterfalls — lets me create a series of variations I can review later in post production. Slowing the shutter speed to a second or more changes the effect dramatically.