I was photographing in Nova Scotia when someone told me that Newfoundland to the north had icebergs. I have always been fascinated with icebergs (I think most people are) and so I decided that my next trip would be hunting icebergs in Newfoundland.
I say “hunt” because I was warned that icebergs were unpredictable and inconsistent. One year you may see many and the next year…none. You just have to go and hope that you’ll be lucky.
I prepare for each of my journeys in a very specific way: I do not prepare at all! I do not look at other photographer’s work from the area, I do not research the “must see” locations and I do not plan my route. I simply go with the hope that I’ll see something that inspires me and that I’ll come home with a new portfolio. It doesn’t always work out that way, but fortunately most of the time it has.
Once I arrive my approach is to simply wander about and look. It usually takes me 2-3 days to unwind before I begin to “see.” And once that happens, I am on the lookout for something that excites me. If I do not feel Passionate about a subject, I just cannot pursue it.
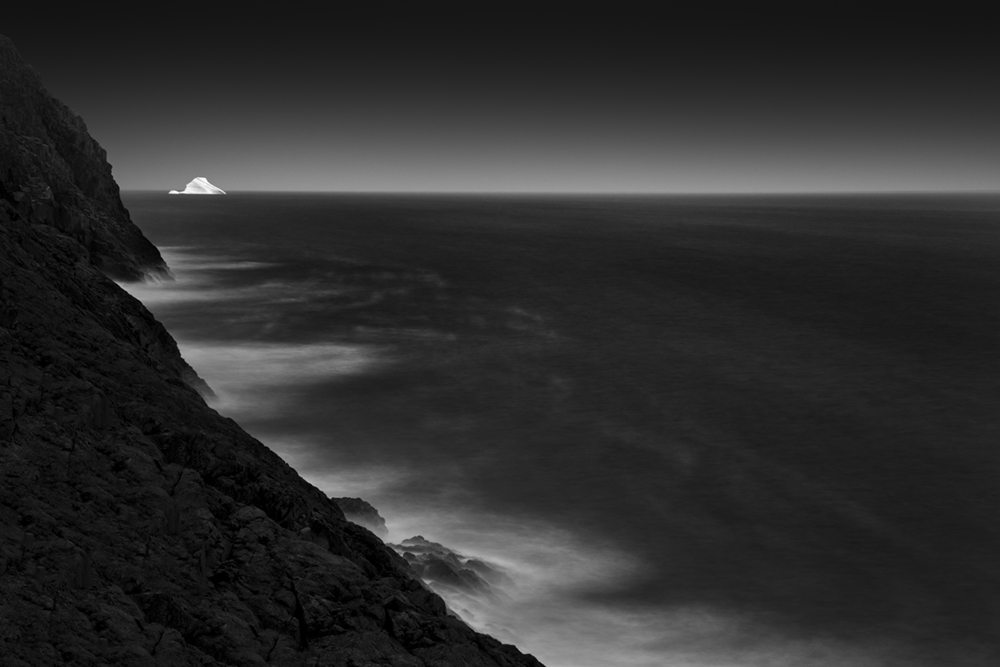
I was so fortunate on this trip because upon arriving in Newfoundland, on my very first day, I saw an iceberg.
It really was a beautiful sight with the extreme whites and the deep blue fissures. As I studied that iceberg, it seemed to be such a lonely and isolated creature, one that had been spawned just a few months earlier and now was dying on the coast of Newfoundland. That felt very cold and isolated.
And with those thoughts, I immediately had a mental picture of how I would portray the icebergs: blindingly white against a very dark landscape. I call this mental image my “Vision” or the way that I see the image in my mind. It is this Vision that then guides the shot and my processing.
My artist statement for “Melting Giants” is a simple two line verse:
Upon birth, they immediately begin to die.
Wandering the oceans, in search of their final resting place.
But there is much more to this story than: I looked, I saw and I created. The truth is that even though I had a Vision of what these images should look like, I still had the challenge of executing that Vision. I always know how I want my images to look (I could argue that this is the easy part) but I don’t always know how I’m going to pull it off technically.
When I saw the results of my first day’s images, I could see there were going to be some serious technical challenges in this project. I wanted to use long exposures to simplify the image by smoothing out the sky and water, but to my disappointment the icebergs were blurred due to movement. I needed to develop several different techniques to address this movement.
The easiest technique was to photograph icebergs that had run aground. Fortunately the bulk of an iceberg is underwater and they run aground quite frequently, sometimes close to shore and sometimes pretty far out.
But often when the iceberg had run aground, it wasn’t completely secure and would rock back and forth with the waves causing camera blur. I had to time the wave sets and keep my exposures to a relatively short 30 seconds, and sometimes this worked and sometimes it didn’t.
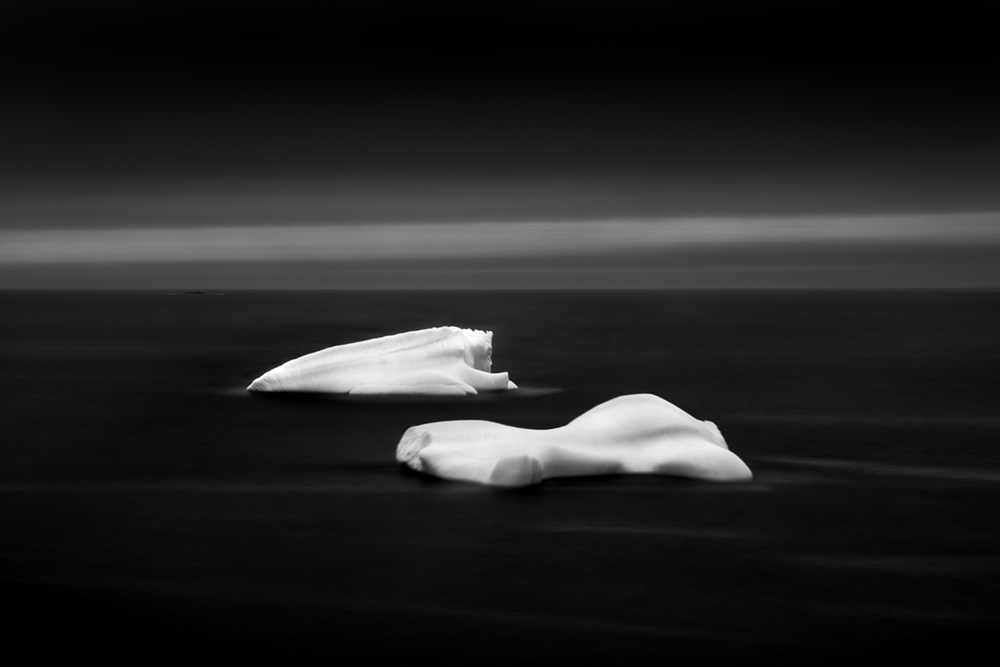
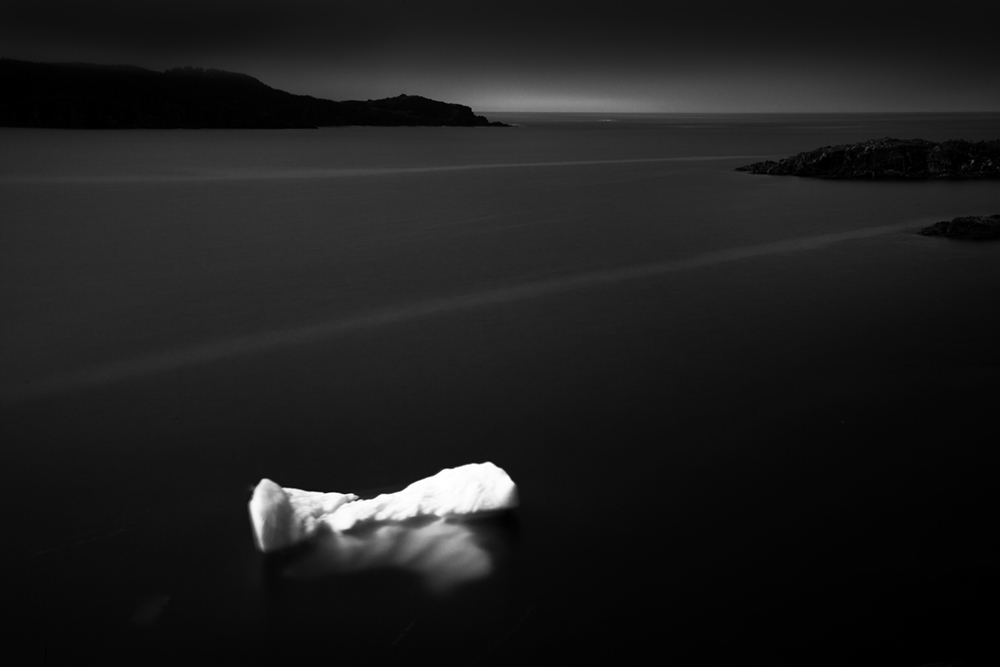
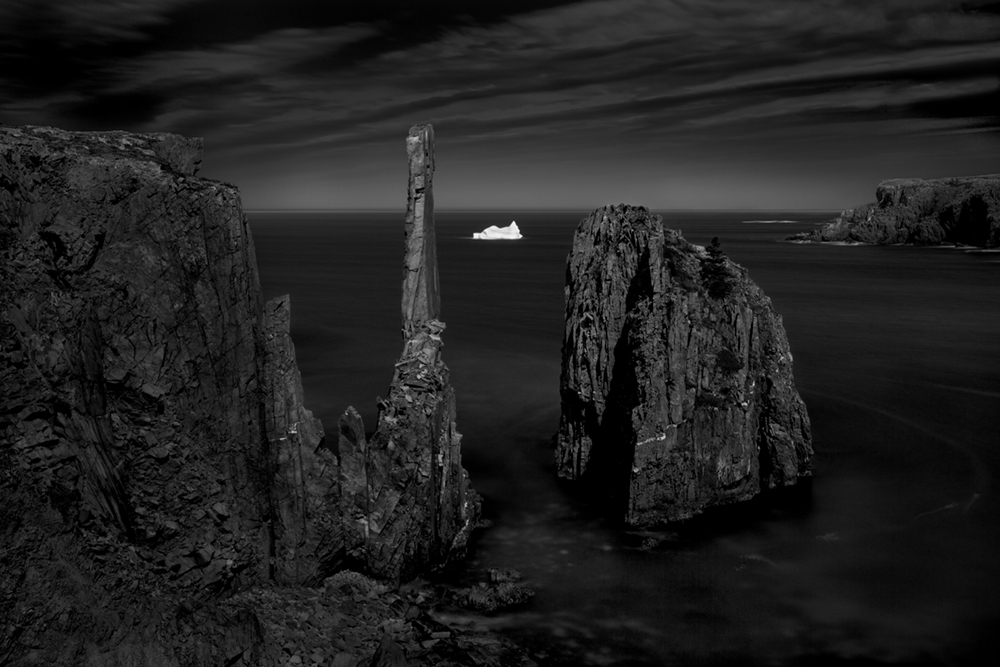
When it didn’t work, I had an iceberg with a double image. What I observed was that usually one of the double images was lighter than the other, a sort of ghost image. I would then remove the ghost double in Photoshop, leaving the relatively sharp and stronger image. In the image above the closer of the two icebergs was rocking and I used this technique.
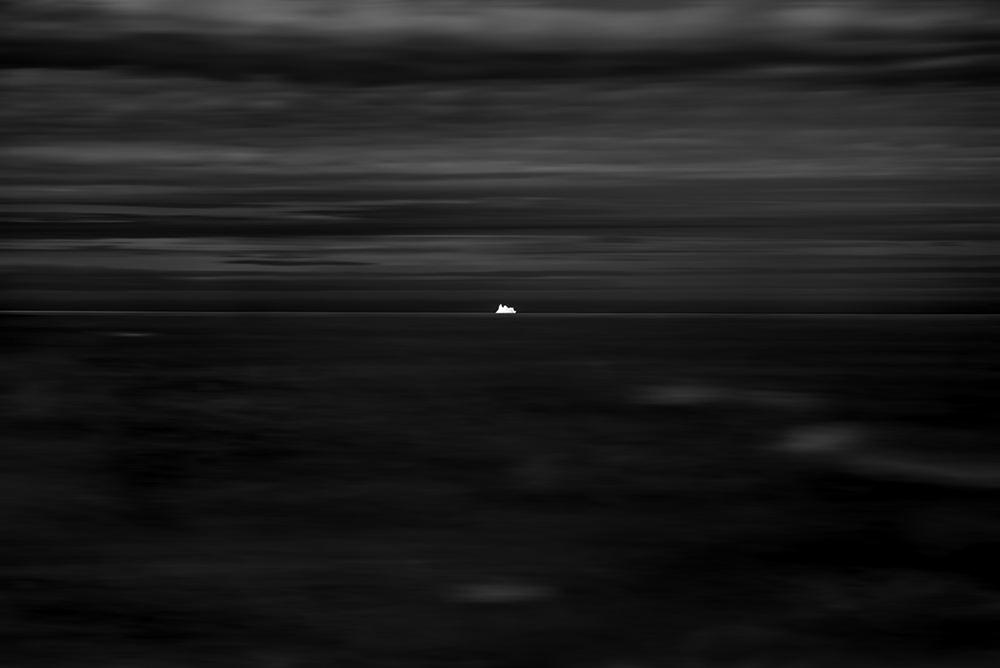
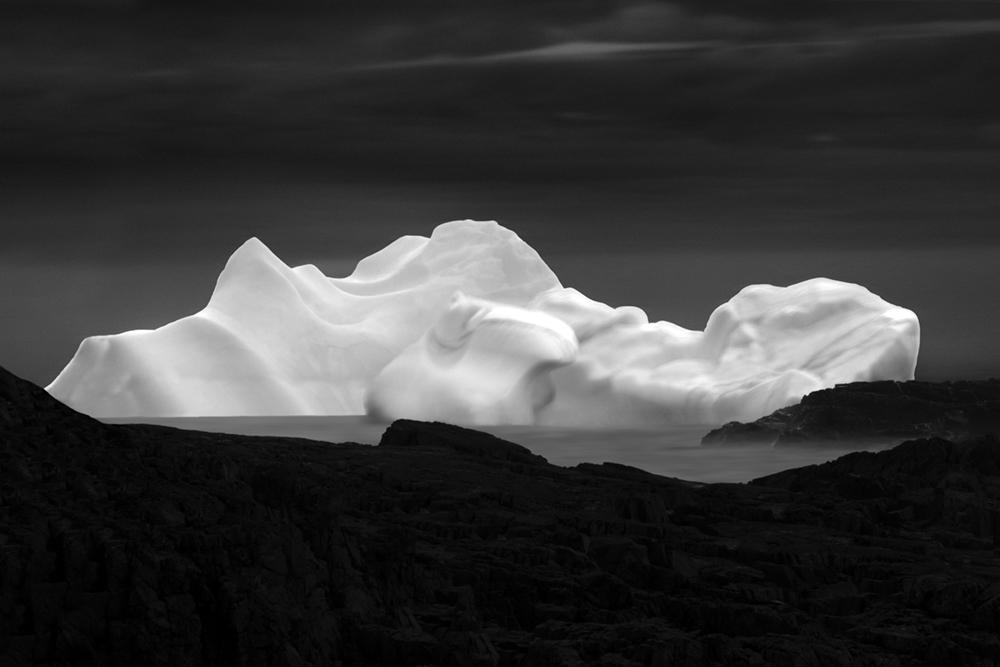
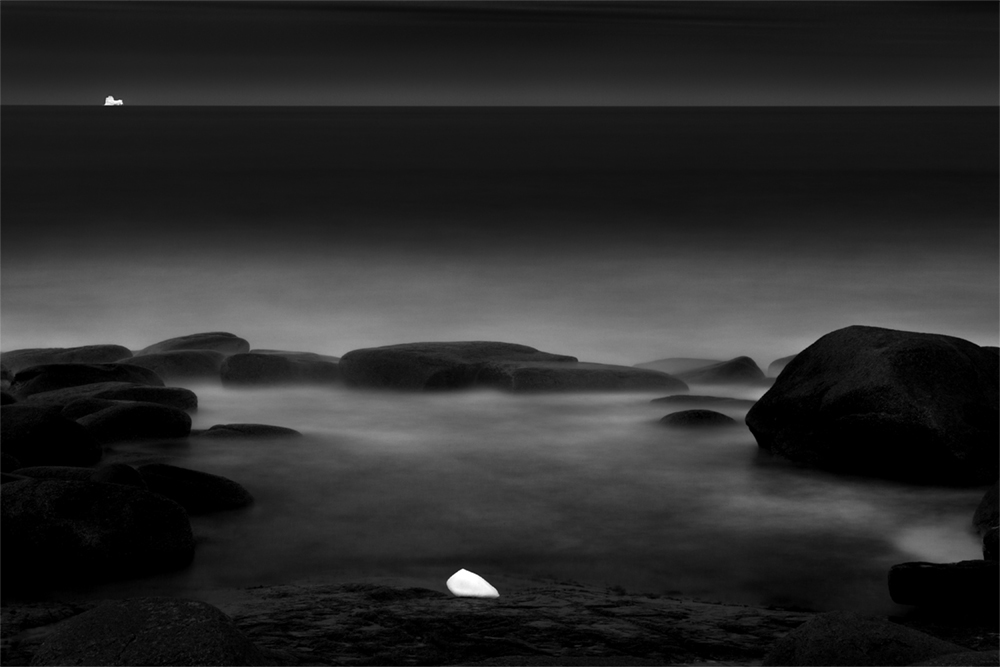
Another technique I used was to photograph icebergs that were very far away, they were moving so relatively slowly that I could use a long exposure without much apparent motion.
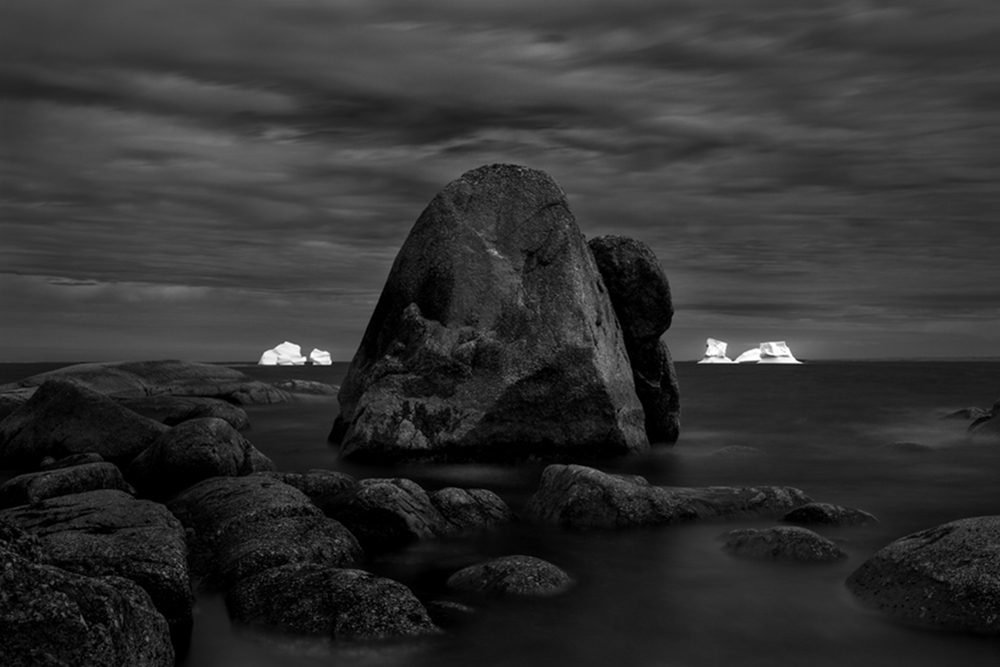
On the image above I resorted to taking two exposures: a long one for the water and a short one for the iceberg, and then combined them in Photoshop.

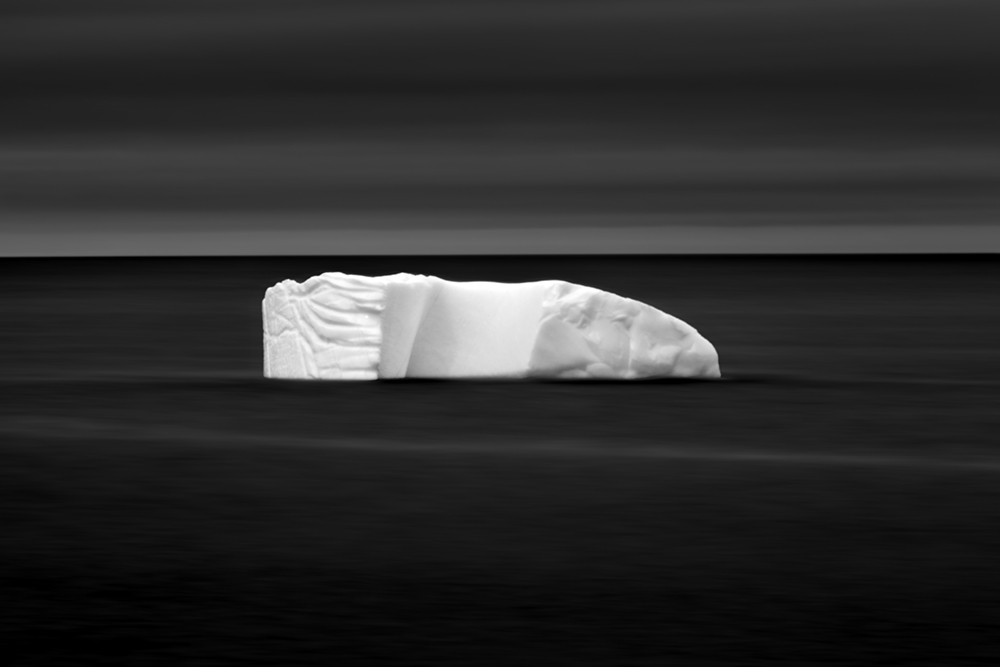
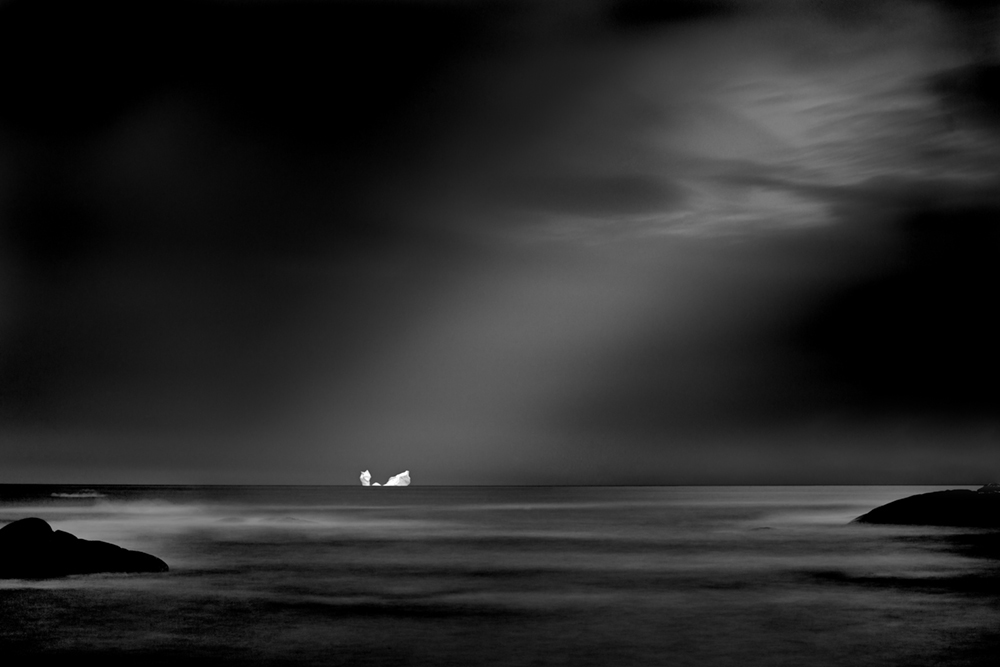
This turned out to be my favorite image from the trip. This iceberg was so beautiful that I had to have it in the portfolio, but it was rocking so badly that I could not get the shot. In frustration I took a traditional short exposure before giving up and then just hoped that I’d find a way to salvage the image once back home.
With the help of a friend, Jack Brinn, I was able to add motion to the water and sky after-the-fact in Photoshop. The look is slightly different than you would get from a traditional long exposure, but it turned out beautifully and the technique saved the image. Thanks Jack!
All of these images were created during daylight hours with exposures ranging from 30 seconds to 6 minutes. I primarily used the Singh-Ray Mor-Slo 15-stop ND Filter because it is so versatile. I can use it for a “short” 30 second exposure or go as long as 2 minutes in bright sunlight, and can get even longer exposures on overcast days.
I prefer to meter through the filter to determine my exposure, for me this is much easier than using a long exposure calculator. But to be able to accurately meter with the filter on, you must use a viewfinder eyecup (such as the ones sold by HoodMan) to seal around your eye as you meter. This seal stops stray light from entering the viewfinder and affecting the meter reading. If you don’t use an eyecup your images will come out severely underexposed.
There were other challenges besides moving icebergs that I had to deal with, such as wind and rain. The wind is always a tough one to overcome when shooting long exposures and sometimes I just had to change locations or wait the weather out. The rain however, was so pervasive that I had to work out a solution or I’d lose too many opportunities.

Sometimes I could physically shield the lens from the rain, but if this wasn’t possible the raindrops would ruin the image due to the incredible depth of field you have when shooting long exposures. And so I developed another technique to deal with these raindrops: I would loosely hold a microfiber cloth and quickly wipe off any raindrops from the filter as soon as they landed. The light wiping action did not jar the camera and most importantly, it was done so quickly that it did not register on the image.
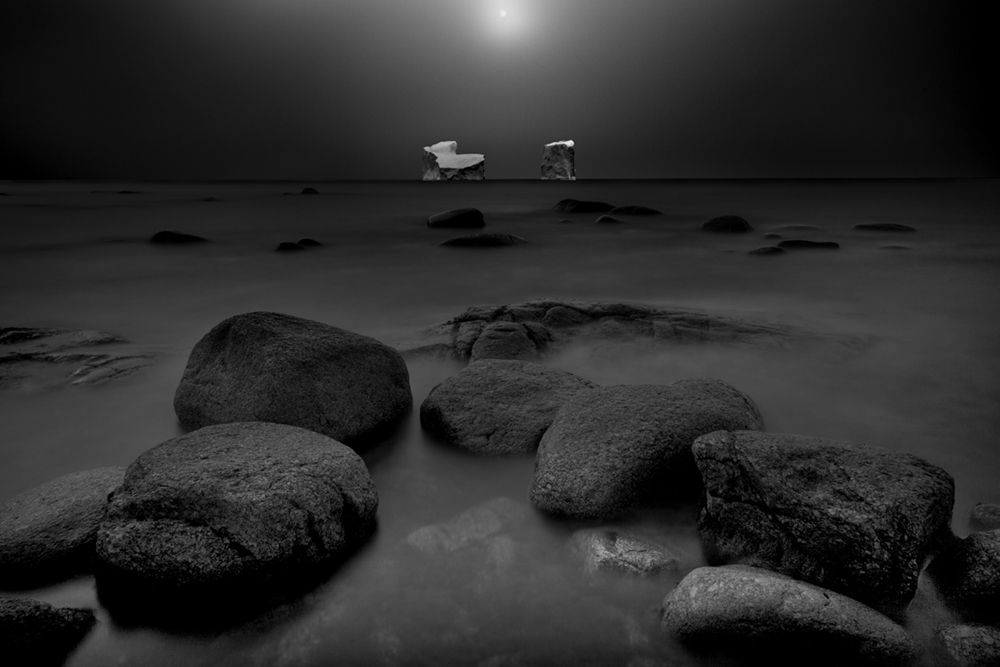
Another challenge was how to produce dark landscapes from shots that were sometimes taken on bright sunny days. I wanted them to be very dark and contrasty but holding shadow detail without looking muddy.
To do this I would first mask off the iceberg and then create the desired look by using the Brightness/Contrast slider, by adjusting the Levels and through Dodging and Burning. The completed image histograms are heavily stacked to the left with only a thin thread representing highlights.
I have always gravitated towards dark images such as in my series “The Ghosts of Auschwitz-Birkenau,” but this is the darkest series I have ever created. I wanted a huge contrast between the bright white icebergs against the very dark background.
I am pleased with how these images turned out, they look just as I had imagined them as I stood there looking at my first iceberg on that first day.
See the entire portfolio of “Melting Giants”