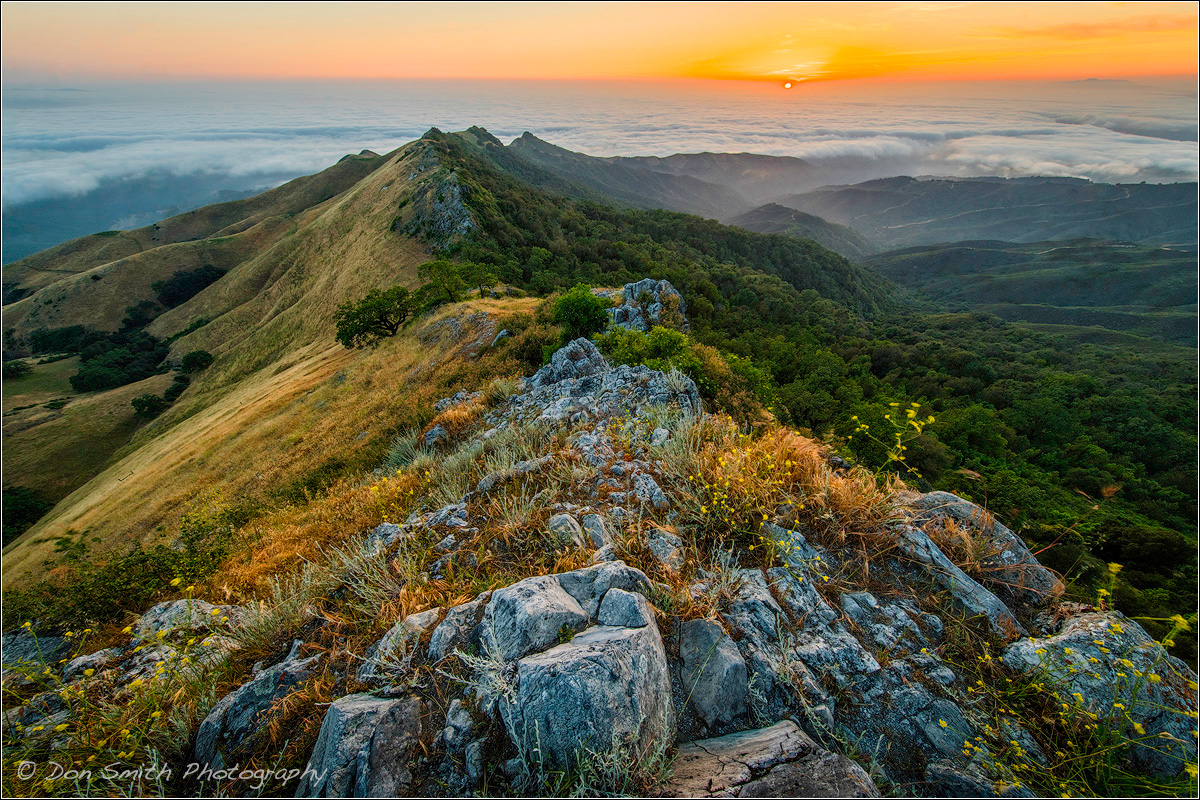
 The sun sets into Pacific Ocean fog as seen from Fremont Peak State Park, elevation 3,169 feet, Gabilan Mountain Range, California. Sony a7RII, Canon 11-24mm, f/16, 1/4th, 100 ISO.
How often do you think about your aperture choice? There is an old saying amongst photojournalists: F/8 and be there! Many amateur landscape photographers seem to think f/16 is the popular choice. If one thinks about maximizing depth-of-field, then their thinking is correct. But when should one use f/22? Is that practical? What about diffraction? How about f4 or f2.8? Does the quality of the lens factor into the equation? Is there a perfect aperture?
There is a perfect aperture for every composition.
I contend that there is a perfect aperture for each frame you make. In fact, there may be a multitude of aperture choices for a single composition depending on how you wish to render the scene. I will admit, f/16 is a popular choice. I use it a lot because I am constantly trying to create the illusion of depth in my images by shooting near/far as seen in the above image from California’s Fremont Peak State Park (elevation 3169 feet). F/16 allowed me to hold focus all the way from the embedded foreground boulders to the setting sun into the fog bank over the Pacific Ocean. So, my first thought once I have found my composition is: what is the best aperture for this scene?
Personally, I begin with f/11 as a standard aperture for each scene I compose – that doesn’t mean I use it, it is simply a starting point. The only true way to know which aperture to pick, for which focal length, is to use a Hyperfocal Calculator. Are they practical in the field? Not if the light is changing rapidly. I do carry one on my iPhone (and there are hundreds to choose from), but the best time to use it is when you just have time to play.
I contend that there is a perfect aperture for each frame you make. In fact, there may be a multitude of aperture choices for a single composition depending on how you wish to render the scene.
I’m sure all of you have read what the fear-mongers post on various internet blogs. Every lens has a sweet spot and that is where you should be. Use an aperture smaller than the sweet spot and your image will begin to fall apart due to diffraction. Select an aperture larger and lens quality becomes an issue. Is that true? Well yes and no.
What about a lens “sweet spot?”
From a completely technical standpoint, every lens does have a sweet spot where it will perform at its absolute sharpest. The common consensus is that it is generally two to three stops lower than the lens’ maximum aperture. Take an f/2.8 lens for example, if we applied that formula, then the sweet spot would fall between f/5.6 to f/8. So, should you just take this information as gospel truth? Certainly not.
The only way to know for sure is to test every lens in your bag. Easy enough. Just put your camera/lens on a tripod and point it at something with a lot of edge detail and make a frame for each aperture starting from the lens’ widest to smallest f/stop’s. Now, bring the images into your computer and view them at 100%. Really check them thoroughly from center to edge. The frame that looks the sharpest overall will tell you the sharpest aperture for that lens!
How about diffraction?
But what about diffraction you ask and what is it? Simply stated, diffraction is a loss of sharpness or resolution caused by photographing with small apertures. Light rays bend as they enter a lens (and its elements of lenses) and even more as it bends around aperture blades within the lens. It’s worst at small f/numbers, like f/22 or even f/32, and can even be an issue at large f/numbers like f/2.8. When shooting at large f/numbers like f/1.4 through f/2.8, sharpness is limited by the lens’ quality and the resolving capability of your camera’s sensor and not so much by diffraction. Both my Canon’s 300mm and 400mm are f/2.8 glass and are razor sharp when shot wide open but less so as I stop down in the f/11 range and beyond.
Does that mean you should only use the sweet spot aperture when using that particular lens? Absolutely not. As a professional, I’m certainly aware of where each of my lenses sweet spots are, and if I can use it, I certainly will. But for me, it’s about getting the image’s depth-of-field correct; thus, if the composition calls for a wider or smaller aperture, then that is what I’m going to use.
When I used to make my living full-time as a sports photographer, I shot action with 400mm f2.8 and 600mm f/4 lenses shot wide-open all the time in order to isolate the athlete and throw the background out-of-focus. I had many cover shots on national magazines (including Sports Illustrated) and not once did the frame look soft. Yet, those lenses were not cheap. A 400mm f/2.8 Canon lens costs $11,500 and a 600mm is $14,000. That is a lot of money but they are razor sharp optics! Again, and I can’t reiterate this enough, choose the aperture based on what the image needs to succeed, not what some fear-monger with all his charts at 300% edge blowups tells you!
OK, I’ve hammered that point enough (you can agree or disagree). So let’s move on to why I believe there is a perfect aperture for every image – and no, it’s not always f/16!
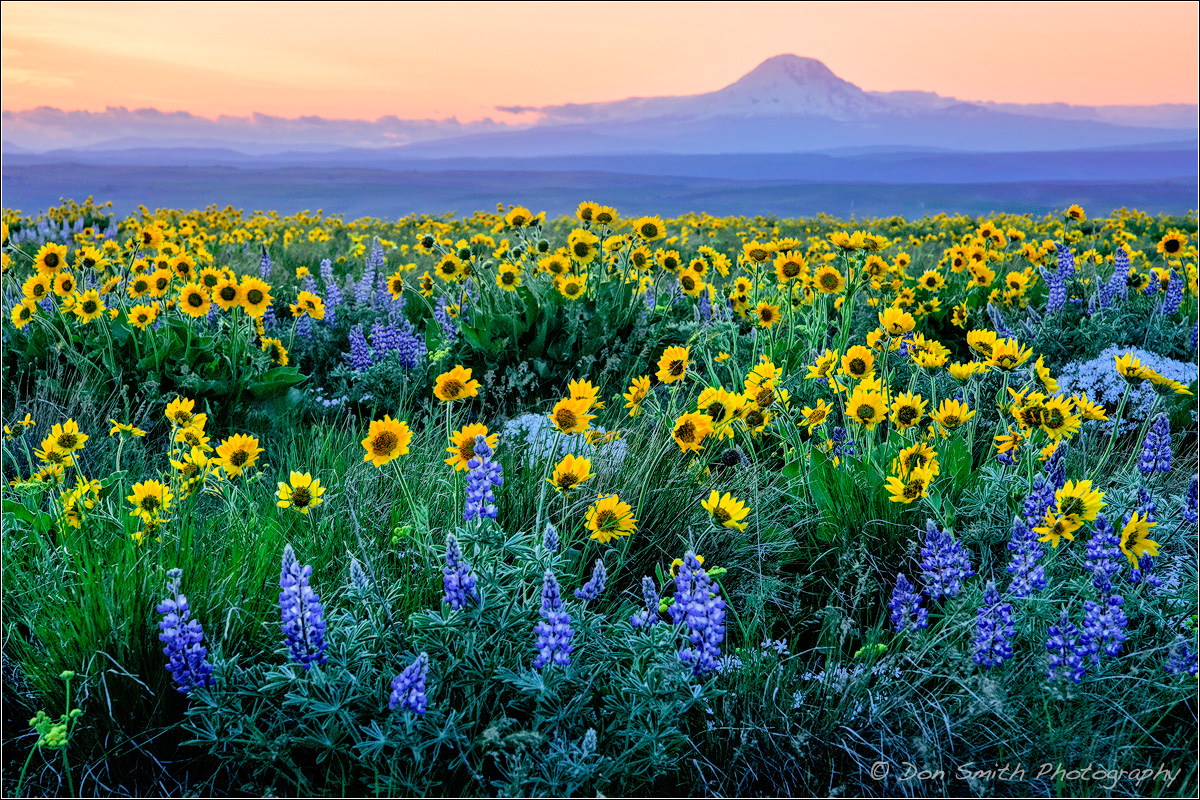 A field of lupine and balsamroot color the hillsides with Mt. Adams in the distance, Columbia Hills State Park, Washington. Sony a7RII, Sony 24-70mm G Master, f/11, 1/100th, ISO 3200.
For this image of Washington State’s spring wildflowers, shutter speed was a priority as what looks to be a very calm scene was actually quite windy. This meant getting a fast enough shutter speed to freeze the wildflowers along with a small enough aperture to allow for near-to-far sharpness. To make this exposure work required an ISO of 3200, which in modern-day cameras allows for minimal noise.
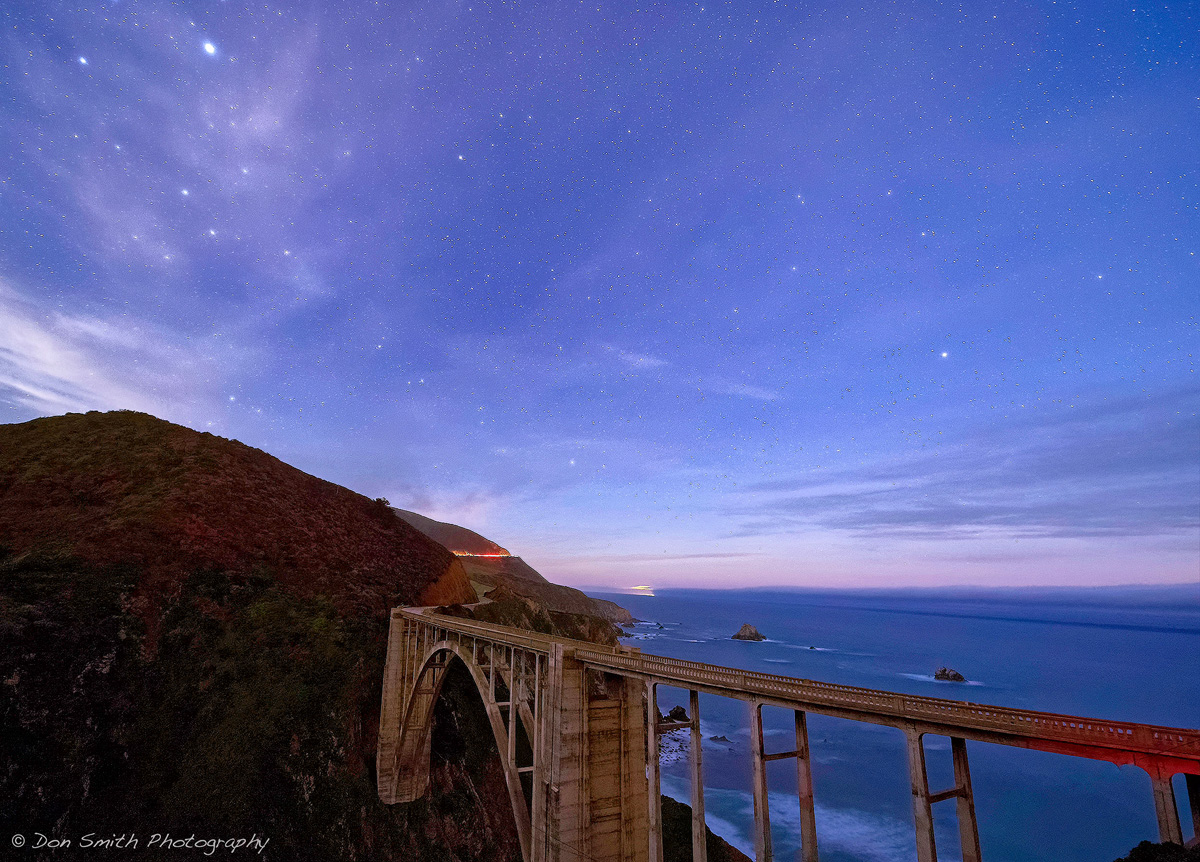 Bixby Bridge and night sky, Highway 1, Big Sur Coast, California. Sony a7S, Nikkor 14-24mm, Metabones Adapter, f/2.8, 10 seconds, ISO 800.
When photographing night scenes, I’m always shooting at the lens’ widest aperture. For this image of Big Sur’s Highway 1 Bixby Bridge, I used my Nikkor 14-24mm wide open at f2.8. This resulted in a 10-second exposure at ISO 6400. Had I used a smaller aperture, the time would have increased and the stars would have begun to streak, again due to the earth’s rotation (there is a bit of star streak when viewed at 100%).
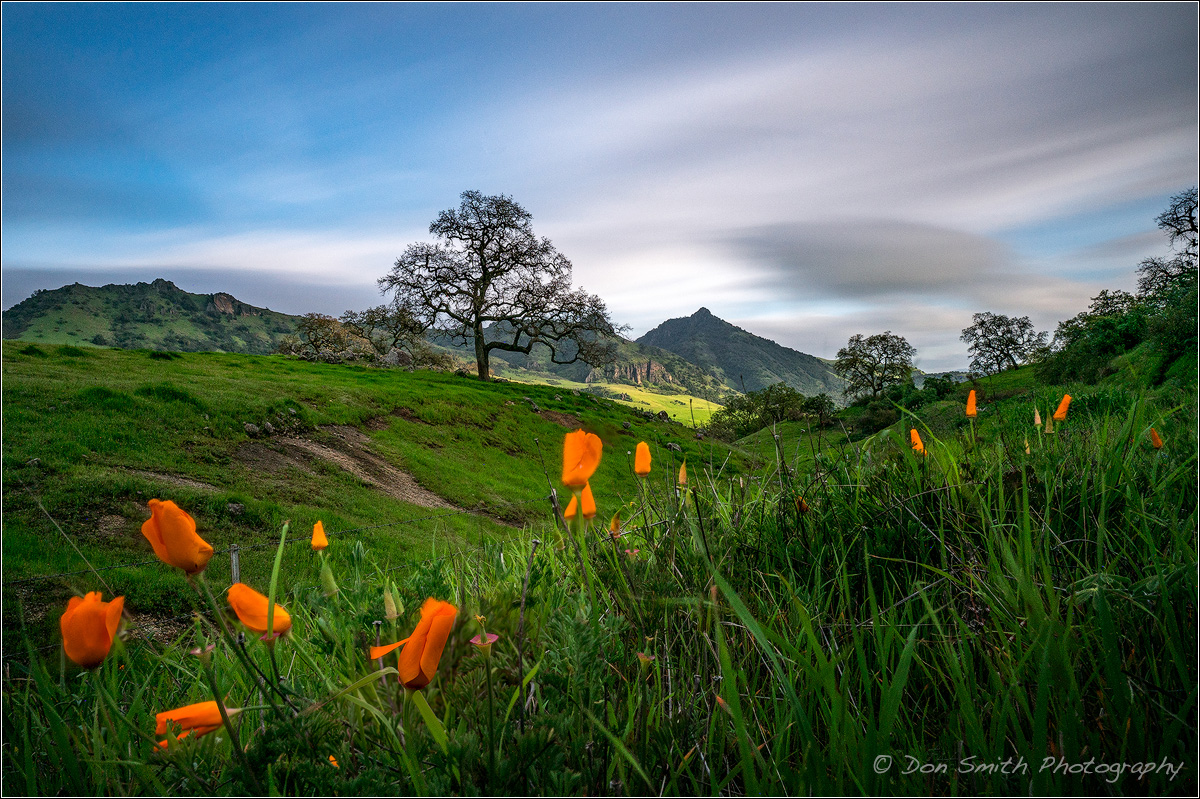 Poppies and Santa Ana Peak, San Benito County, Southern Santa Clara Valley, California. Sony a7RII, Sony/Zeiss 16-35mm, 1/100th, focus stacked to increase depth-of-field, ISO 100.
Lastly, let’s take a look at another image that achieved by making two exposures with one frame focused for the poppies and one for the tree and mountains. These flowers were so close to the front of my lens that there was not way to hold focus throughout the scene, even at f/22. In Photoshop, I simply blended the two exposures together to make one very sharp near-to-far frame.
I could show many more examples of varying apertures for landscapes but I think you get the picture (pardon the pun). The key is to ask yourself how you wish to render your composition. Once I get the proper aperture that renders the scene the way I pre-visualized it in my mind, then I can always change my ISO to get a suitable shutter if movement of any element within the composition is an issue.
So think Composition, then Aperture. Make choosing the aperture a conscious thought, and if you need a smaller aperture, then don’t get so hung up on diffraction. Don’t let the fear-mongers influence you to the point that you don’t properly record the image at the proper aperture needed to match your pre-visualization of the finished image!