“To Photoshop” or “not to Photoshop,” that is the question. Well, not really, but for an all-in-camera professional like myself, there really is no choice. I believe there is absolutely nothing wrong with Photoshop, Lightroom or any other post-processing techniques used to create images, as this is the accepted norm these days. In fact, I’m a fan of many professionals out there who post process their images and produce outstanding images using their post processing tools. I believe each individual photographer, amateur or professional, should seek out whatever direction their photography techniques take them, and use any tools they feel necessary to create the finished image they have envisioned. In other words, each and every one of us should do what makes us happy, and keeps us out in the field shooting.
In attempting to set myself apart, I’ve embraced a different style of photography, dating back to my days shooting slide film. I call this “all-in-camera” or “old school photography” and I’ve made a name for myself by using no post processing at all. Students fly in from around the country to take lessons from me on this all-in-camera style of image making, and customers who come into my gallery seem to really appreciate my “old school” approach. Most find it difficult to believe that I can create the dramatic images I produce without the use of any post processing.
My goal, in a series of blog posts here on the Singh-Ray site, is to share with you the camera set ups and shooting techniques I use to capture my all-in-camera images. This is the first post in that series. I hope you find them useful and informative for your own photography.
To begin with, I can’t emphasize enough the importance of graduated neutral density filters, which are absolutely essential tools for balancing light. I always carry the 1-, 2- and 3- stop Singh-Ray Galen Rowell grads in both hard and soft edges. I also always have a Singh-Ray Daryl Benson 3-stop reverse ND with me, in addition to 5-, 10- and 15-stop Mor-Slo solid neutral density filters to lengthen exposure times and a Singh-Ray thin LB warming polarizer on each one of my lenses. I would not be a successful professional photographer without these filters to help me balance and control light – and achieve the optimal image right in the camera.
In image below, titled “A Winters Sunrise” over the Tatoosh Range from Mt Rainier National Park in Washington, I used both a 1- and 2- stop hard-edge Rowell grad to balance the contrasting light between sky and ground. This was shot with a Canon 5D Mark 3 at f/20 for maximum depth of field and is a ½-second exposure in Aperture Priority at -2/3 stop exposure compensation. ISO is set at 100, White Balance 5800K, shot with a Canon L Series 24-105 lens set at 24mm. And I am using my landscape “Roll of Digital Film” setup to emulate Kodak Ektachrome slide film. I will explain more about this “digital film” in future posts.
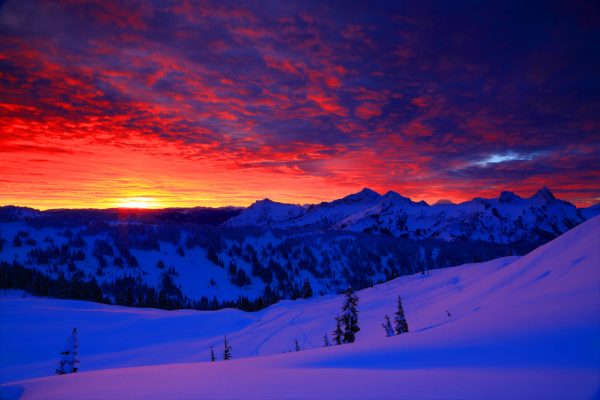
Why did I used both a 1- and 2-stop grad, instead of just a 3-stop in this image? Even though this image required three stops of light to balance the scene, by using both a 1- and a 2-stop filter, I was able to slightly offset the filters, helping me hide the filter line in the image. The 2-stop filter was set right at the mountain horizon line, and the 1-stop pushed an 1/8 of an inch below into the mountains. I call this technique “finessing the filters” and I do it quite often in my work.
In this image below, titled “Sunset on the Magicians Hat” from Face Rock Beach in Bandon Oregon, I’ve used both a 1-stop Rowell hard-edge grad and a 3-stop Bensity reverse grad. Whenever the sun is going down or coming up in my image, and is very near the horizon, I always start with my 3-stop reverse grad. In this image, the three stop of density was not quite enough, so I added the 1-stop hard-edge grad over it, again slightly offset, to create the perfect balance. This also was shot on the Canon 5D Mark 3 in Aperture Priority, f/22 at ½-second, -1 stop in exposure compensation, ISO 100, and using my landscape “Roll of Digital Film” setup with the white balance set at 6200K using the L series 24-105 lens set at 24mm.
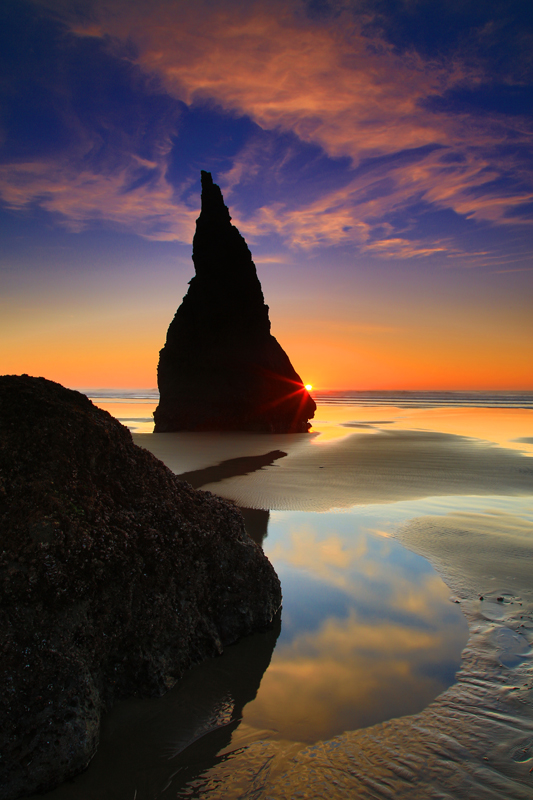
Again, by offsetting or “finessing” the filters, I believe I have perfectly masked the filter line in this image.
There are many reasons I choose to be an “all-in-camera” shooter. One is that shooting over 10,000 new images a year, I simply do not have time to post process them. I also work with many publishers who do not except altered, blended or HDR images. Many publishers do except these images, but there still are a lot out there who do not. So, by not altering or post processing my images, I feel I get published more, generally 300-400 times a year. Also it has given me a kind of niche, for customers who appreciate my “Not Digitally Altered Images,” and for students who do not want to learn elaborate post processing techniques, but rather how to do all their work in the camera.
But for me, probably the number one reason I like doing all my work right in the camera is showing the image to whomever is standing next to me in the field, with everything already there on my LCD screen. If you are ever standing next to me when I capture one of these all-in-camera images, you just might hear me say my catch phrase… “Pow, nailed it… it’s in the bank!” It’s a very satisfying feeling, at least for me, and gives me a real sense of accomplishment.
I hope you’ll join me for future posts on this approach, in which I will expand on in-camera setup and shooting techniques to capture beautiful, all-in-camera images!